June 2026
Create an Experience Embed for internally created games and experiences
1. Create a new article and navigate the “Add Paragraph” section.
2. Click on it and select “Media.”
3. Select Experience Embed to open the Experience Embed Drawer.
- For the Experience Div Id
Add: pick-your-xi - For the Experience script URL
Add: https://assets.minutemediacdn.com/voltax-experiences/prod/pick-your-xi/pick-your-xi.js - To preselect the starting country, press the Country / Team dropdown and select one of the 48 countries, All Teams mode (build your 11 with players from all countries), or set it to default mode, which will try to detect the country based on geolocation.
4. Press Add to save the element inside the article.
May 2026
How to add the Third Party Embeds to the CMS page
1. Create a new article and navigate the “Add Paragraph” section.
2. Click on it and select “Media.”
From the media selector, choose the last tile called “Third Party Embeds”, It will prompt new sidemenu on the right.
Add content of your embed, ensure that the format of the code is correct and whitelisted. Provide appropriate sizes for each display type. (Note: The embed might differ in size and layout depending on the display type!)
In this view you will only be able to see the desktop size.
Once you are happy with the results press “Add” button to preview it in the CMS Editor view
In this view you will only be able to see the desktop size.
When your content is visible on the page, you have adjusted the size and you are happy with the results, press “Preview” in the top right corner to view this in the preview mode.
Test all display types to make sure the layout looks correct.
January 2026
The Site Structure taxonomy fields are live on SI National now. 
In the CMS, these fields are called Section and Sub Section under the Site Structure Section.
How it works
-
Section (required): the high level category that always appears as the first segment of the URL after the base path.
Example: https://www.si.com/<section>/...
-
Sub Section (optional): a more specific category that appears in the URL only when selected.
Example: https://www.si.com/<section>/<sub-section>/...
Key rules
- Section always appears in the URL.
- Sub Section appears only when selected.
- “Main Category” is not used in URLs.
Also, if needed, you can always add, edit, or remove Section and Subsection terms via the Taxonomy UI as well.
December 2025
Hi all,
The Site Structure taxonomy fields are going live on SI National now.
In the CMS, these fields are called Section and Sub Section.
How it works
-
Section (required): the high level category that always appears as the first segment of the URL after the base path.
Example: https://www.si.com/<section>/...
-
Sub Section (optional): a more specific category that appears in the URL only when selected.
Example: https://www.si.com/<section>/<sub-section>/...
Key rules
- Section always appears in the URL.
- Sub Section appears only when selected.
- “Main Category” is not used in URLs.
- This applies consistently across all sections, including Soccer.
Also, if needed, you can always add, edit, or remove Section and Subsection terms via the Taxonomy UI as well.
November 2025
Ability to control the ad experience
- Default: no changes here, this is the current behaviour
- Ad Free: clean video without monetization
- One Preroll: only one ad before the video begins, no mid-roll ads
3. Once you have the code, open the CMS, paste and upload the video
August 2025
Page Builder Updates
-
Hero Component- We added the ability to hide the meta and title in the Hero Component.
-
New Image Component
- 1440px wide
- No cropping requirements
- Not linked to an article -
New Sponsored Component
Live Blog In Voltax Editor
June 2025
Mobile Preview in Page Builder
When opening the preview mode, you'll be able to select Mobile view.
April 2025
Click to Play video
March 2025
Silent Update
We’re excited to introduce a highly requested feature — Silent Update — now live in the Voltax CMS editor!
With Silent Update, you can now make changes to published articles — like fixing a typo, swapping out an image, or making quick content tweaks — without triggering an update to the article's timestamp or feed placement.
How It Works:
When you're updating an article, simply click the dropdown next to the Update button and select Silent Update. This will save your changes quietly, keeping the original "last updated" date and feed position intact.
Why It Matters:
- Perfect for minor edits that don’t need changing of the article update timestamp
- Keeps your content polished without unnecessary disruptions to readers or SEO rankings.
- Gives editors more control over how updates appear publicly.
This small but effective feature gives you more editorial flexibility without compromising the integrity of your content timeline.
As always, we’re here if you have any questions or feedback. Happy editing!
This feature will be available for both new and existing (published) posts.
October 2024
Article URLs Update
We removed the /posts/ prefix from the article URLs for all the properties.
This only affects new articles. The URLs of published articles will not be affected.
July 2024
Getty Creative for Mentalfloss
Please note that this feature is only available for writers covering Mentalfloss.com
The flow for users is pretty simple, similar to the Editorial images. The only difference is that each plug in calls to a different API (one brings 'editorial' images, the other brings 'creative')
Poll Element
June 2024
Import Content
We released a new Voltax CMS Editor capability, allowing users to import content between properties.
For more information, please visit How to Import Articles in CMS Editor.
May 2024
Teams Feature
We've added the option for writers to select the teams mentioned in the article from a closed list through the Editor and the Publisher.
January 2024
Drafts Review
We've enabled the option for CMS Managers and CMS Editors to view, edit, and delete the drafts of the active writers under their property.
Betting Fields in Article Customization
We've added a new toggle switch for betting-related content to the Article Customization section of the CMS Publisher.
Exclude Content from Recommendations
We've added a new toggle switch to the Article Customization section of the CMS Publisher for excluding content from article recommendations.
September 2023
AI-Generated Headlines Suggestions
We've added the option to generate headlines based on your article content within the Voltax CMS Editor!
Please note that this feature is currently available for select sites.
July 2023
Content Enrichment Embed Creation within Voltax Editor
We enabled the option to create content enrichment embeds within the Voltax CMS Editor!
For more information, please visit How to Create a Content Enrichment embed within the Editor.
June 2023
Intro Paragraph
We’ve added the option to add an intro paragraph displayed right below the article title and above the article’s main content.
For more information, please visit How to add an intro paragraph.
March 2023
Questions & Answers
To improve our SEO efforts, we created a new component called “FAQs,” which allows users to specify FAQ articles so Google can easily recognize the content type.
For more information, please visit How to add Q&A to an article.
January 2023
Group Of Links
In order to improve the traffic through internal links in our sites, we created a new component called “Group of Links,” which contains URLs of articles from the property and can be embedded in every post page of the site.
A group of links contains up to 10 URLS that could be added manually or automatically. In the manual group of links, users add the URLs that require showing in the component. In the automatic group of links, the user selects the feed page whose content is displayed in the embedded group.
In order to create a GOL, the user must create a new embed in Enrichment (under CMS) and then embed it in the article in the Editor.
For more info, please visit How to add a GOL.
Table Of Contents
We have enabled users to add a TOC within their Voltax articles!
This feature will allow editors using the CMS to create a table of contents for long articles, improving the user experience and navigation within the article. In addition, creating a shareable URL for each section (paragraph) inside an article will increase the CTR from Google search by displaying specific sections on the search results.
For more information, please visit How to use the TOC feature.
December 2022
HTML Tables
We have enabled users to add tables within their Voltax articles!
The current version is still in the beta stage and has the following functionality:
- The ability to create a new Table with rows and columns (minimum two each).
- The first row is a header row by default and cannot be changed.
- At this point, only plain text is supported. We do not support media, images, hyperlinks, or formatting (e.g., bold, italic, underline).
- All text inside cells will be aligned to the left with no option to change the alignment.
- The only way to change the table structure (i.e., number of rows and columns) is to copy the table contents to the clipboard using the dedicated button, create a new table with a new structure, and paste it into the new table.
August 2022
New Voltax Navigation
We launched a brand new navigation design for Voltax!
January 2022
Article Labels
Editorial teams can now label articles within the Publisher to help categorize and filter content according to their individual needs.
To label an article, follow the steps below:
1. Click on the "Labels" icon
2. Type in the required label and press "Enter"
3. Click on the "Apply" button
For more info please visit How to add article labels & How to filter articles with specific labels
December 2021
Widget Page Glasgow
Site managers are now able to add full-page widgets to their site using the new Glasgow Widget Page template.
The Glasgow template is configured through Craft and allows for the creation of full-page widgets along with a title, sub-title, layout (header & footer), meta description, scripts (ex. RevContent), and URL.
Exclude from RSS
Editorial teams are now able to exclude articles from their site's RSS feed via the Publisher's "Article Customization" screen.
If necessary, before publishing an article, editorial teams can toggle ON the "Exclude from RSS" button below:
Once toggled ON, the specific article won't be included within the site's RSS feed, which is accessible via the site itself and shared with syndication partners.
This button will be toggled "OFF" by default, which means all articles will be included within the RSS feed unless decided otherwise by the editorial.
Canonical URL
A canonical tag (aka "rel canonical") is a way of telling search engines (Google in particular) that a specific URL represents the original source of a page.
This means that all SEO power of an article will be attributed to the URL that is added to its "rel=canonical" HTML tag.
Using the canonical tag prevents problems caused by identical or "duplicate" content appearing on multiple URLs.
When editorial teams publish articles on their site, Voltax automatically uses the articles' URLs as the "Canonical" by default.
In cases where a different "Canonical" should be added, Voltax enables editorial teams to customize the articles' canonical URLs via the Publisher's "Article Customization" screen.
See below the "Canonical URL" toggle button:
Turn ON the button and insert the URL that should be used as the article's Canonical:
Important notes:
- If the "Canonical URL" field remains empty, the article's URL will be used as the "Canonical"
- The "Canonical URL" must start with “http://” or “https://”
- Articles with an external canonical URL are recommended to be excluded from RSS
November 2021
Article Disclaimer
Voltax users now have the option to add a disclaimer message to articles in cases where it is legally required (commerce, affiliate links, etc.).
To define a disclaimer, follow these steps:
1. Craft Admin Users - Edit the disclaimer and select its position in “Post Page Template” via Craft > Pages
2. Add the disclaimer to the article through the Publisher by adding a “disclaimer” commercial tag
Note: If step 1 isn’t completed, nothing will be added to the article.
October 2021
September 2021
August 2021
"Sponsored" tag for hyperlinks
In light of recent changes to Google’s algorithm, the "No follow" and "Sponsored" attributes should be selected for each sponsored or affiliate link that is added to an article as a hyperlink to mitigate the risk of Google's penalties.
Follow the steps below:
- Select text within the CMS Editor
- Click on the "Hyperlink" icon
- After pasting the link, check the "Sponsored" and "Add no follow" boxes
More information from the head of Minute Media’s SEO team:
I wanted to update all of you on Google algorithmic changes related to links to "improve the ranking for product-related searches and better reward high-quality content".
Google has updated its guidelines regarding affiliate links.
According to Google:
"When we find sites failing to qualify affiliate links appropriately, we may issue manual actions to prevent these links from affecting Search, and our systems might also take algorithmic actions. Both manual and algorithmic actions may affect how we see a site in Search, so it's good to avoid things that may cause actions, where possible."
June 2021
Linkable Images
CMS users now have the ability to add a “target” link to their embedded images within the Voltax Editor to direct readers to a landing page of their choice.
Follow the steps:
- Head to the Editor and start writing a new article
- Click on the "Plus" sign within any paragraph and click on "Media"
- After you select an image, turn on the "Target link" toggle
- Paste the URL that you want readers to be directed to when clicking on the image
-
Note you can check the boxes below whether you want the URL to be opened on a new browser tab or not to be followed by search engines:
- Open in new tab - Check this box for external links to be opened in a new browser tab
- No-follow - Check this box for external links that were added for commercial purposes or lead to unrelated content.
Note: Linkable images cannot be applied to the cover image of an article.
Editorial Menu Update
After comprehensive research and feedback from tech and editorial teams, we’re very excited to announce the release of our brand new Editorial Menu within the CMS!
This new feature brings SEO to the forefront and makes Voltax's CMS even more intuitive & efficient while encouraging content optimization.
Overview Menu
The new Overview menu contains three mandatory and three recommended SEO fields. As users fill in each section, the related fields within the menu will automatically update to show what is complete and what is still missing.
Users can also click on each item to quickly be directed to the relevant field (Take me there).
Note: The entire menu can be collapsed by clicking on the icon at the bottom right part of the screen.
SEO Optimization
Throughout the new SEO Optimization section, users will receive more info about SEO value gained from each element.
Even better, users can click on the "Lightbulb" icon to get pro SEO tips & guidelines or click on the Orange "SEO" button to view the complete SEO documentation in the Voltax Help Center.
-
SEO fields - SEO Title & Description
- To improve the user’s workflow, the SEO title & description now sit in their own section within the SEO optimization menu.
- If the fields remain empty, the article’s title and first 160 characters will be used as the SEO title & description respectively.
- Hyperlinks - Quick access to Voltax's smart hyperlink suggestions
-
- Users can now quickly access Voltax’s smart hyperlink suggestions in a dedicated section that sits below the SEO fields menu.
- Editorial hyperlinks are a powerful way of funneling readers to your site's main pages and help search engines better establish a clear information hierarchy of the site.
-
Every time users open this sub-section, suggestions will be auto-refreshed according to the current article's content.
- At any point, users can click on the "refresh" button to view the most updated results.
-
Tags - Categorize your articles by adding multiple content-tags
- Also included in the SEO optimization section is an exclusive Tags menu where users can add tags to help categorize articles.
- Tag suggestions are generated at the bottom of the section based on the article’s content.
- Users should include at least three tags per article.
Social Sharing
Within the new Social Sharing menu, users can configure the article card’s details that appear when shared across social networks.
Note: If the fields remain empty, the article’s title, cover image, and first 160 characters will be used as the article card’s title, image, and description respectively.
March 2021
SEO-Title
The SEO title is a major factor in helping search engines understand what your page is about, and they are the first impression readers have of your page, as they are shown in search results. Adding a good SEO title will optimize the article's ranking and increase its click-through rate.
Note: If this field remains empty, the article’s title will be used as the SEO title.
Where:
- Open the "Editor" and click "Write a new article"
- Head to the "Tags & SEO" section
- The "SEO Title" field will appear beneath the "SEO Description" field
Tips:
- Write a short, unique, compelling, and accurate description of the page.
- Use the main targeted keywords within a naturally phrased sentence.
- Keep it short, between 50 - 60 characters.
Alt Text
Alt-text is an important attribute that describes the image for SEO and accessibility purposes which helps search engines understand its context. This text will be displayed when readers place the cursor over the image and also in cases the image fails to load (the alt is particularly important for cover images).
Note: If this field remains empty, the caption will be used as the image’s alt.
Where:
- Open the "Editor" and click "Write a new article"
- Add a media block (cover image, image upload, Getty, Imagn)
- The "Alt text" field will appear beneath the "Caption" field
Tips:
- The alt should be accurate, short, and most relevant to the article
- Naturally incorporate the most relevant keywords (avoid keyword stuffing).
- When uploading an image locally, please give its file a descriptive name.
- Keep it up to 125 characters long
February 2021
New Post Page Editing Screens- Craft UI:
Via Craft > Pages, similar to how we edit the homepage and feed page configurations, users will be able to edit various page settings relevant to every post page template in the platform.
These include:
- Byline
- RevContent and OpenWeb widget IDs
- Social sharing options
- Slideshow parameters
- Content Recommendations
- Video Player ID (AMP Only)
- Video Playlist ID AMP Only)
- Analytics Config URL (AMP Only)
- Comscore ID (AMP Only)
December 2020
- The Categories' names can be edited via Craft (by clicking on the "edit" button on each item within the table) but they can't be deleted.
- Be aware that the "Main Category" is only used for labeling your articles on the site-side, make sure not to confuse it with the "DFP Category" that is used for targeting purposes.
- Selecting the article's main category isn't mandatory, yet will help SEO by increasing your site's internal linking and your pages' ranking in Google.
- If you have some evergreen content that was already published to your sites, you can search for those articles via the publisher table, click on them and add the relevant categories.
Slideshows:
- If this will be the first slide's URL: www.minutemedia.com/slideshow
- So this will be slide #2 URL: www.minutemedia.com/
slideshow/2
To use this feature, you can view it in the FAQ section here
Now we made it even easier to add images and embed media blocks within your articles.
We've replaced our previous embed "Carousel" (as seen below), with a new "Playground" that gives much better accessibility to the various embed types.
Now, you'll be able to easily see the plugins/embeds names with a "Crown" icon indication on top of the premium/paid embeds that not all Voltax's brands have access to.
How it works:
To view the new menu, follow these simple steps:
- Click on "Write a new article" via the "Editor" table
- Click on the "Plus" sign and then click on the "Media" icon for each block (for the cover image click on "Add article cover" on top of the editor)
- Click on each item in order to embed it into your article
- Click on the "Back" button in case you want to go back to the initial embeds menu
This new design will help us scale up to support many more future embed possibilities while keeping them highly accessible.
Looking ahead, when multiple embeds will be added, we plan to integrate a "Search" capability to help find the specific embed you need.
November 2020
We're very excited to announce our first version commenting within the Editor.
Now, we enable editors to utilize this new feature to provide the writers with editorial feedback.
How it works:
Editors and writers can add comments per block within the Editor according to the following flow:
- The editors enter the Publisher
- They head to any submitted article and clicks on “edit”
- Then click-on (or hover over) one of the blocks to reveal the “comment” icon
- Clicks on the icon to open the “commenting” box
- Add a comment into the input field and click on the “comment” button (or press enter) to insert a new comment
- You can close the “commenting” box by clicking on the “X”
- Then the “comment” icon will be anchored next to the relevant block with an indication of the number of comments added
- The commenting feature can also be used by writers to add notes to themselves or to the editors that are reviewing their articles
- You can add comments next to the title if you want to add comments about the title or add general comments to the whole article
Later down the line we’ll enable access to this feature via the Editor table, add an option to “Resolve” comments, and many more...
September 2020
Enhanced copy pasting abilities
Keep in mind that these capability were optimized for pasting text that was copied from the following sources:
- Google doc
- Gmail
- Voltax article pages (will also preserve “open in new tab” & “no-follow” if added)
Craft Infrastructural Changes:
As it is probably the biggest milestone we've achieved this year, the Craft infrastructural changes are officially behind us.
So after we've completed the Craft Home Page editing screen over our new and improved infrastructure (from the previous update), the new Feed Page and Author Page editing screens are now up and running.
Feed Pages:
- FeedPageBangkok (used for all our O&Os except TheDuel, previously known as FeedPage):
- FeedPageLondon (used for TheDuel, previously known as FeedPageTheDuel):
- FeedPageChicago (used for TPT's feed page template)
- FeedPageOrlando (used for TPT's sponsored feed page template)
The Feed Page editing screen is compiled out of the following sections:
Top section
- Title
- Subtitle
- Background image (relevant for the "Orlando" and "Chicago" templates only)
- Caption
- Credit
- Select feed (relevant for the "London" and "Bangkok templates only)
Sponsored section (relevant for the "Orlando" template only)
- Sponsored Logo
- Logo Alt text
- Sponsored URL
- Sponsored text
Feed section
- Title
- Select feed
- Feed limit (limit options vary according to the template) - Here you can define how many posts will be appear on the page within its feed section
- Article loader button (referring here to the "Show More" button at the bottom of the page)
Page settings
- Meta title
- Meta description
- DFP category (type in the exact DFP category for targeting the relevant ads to the page)
Page URL - use this component to build the Page's URL
- These pages can be created/edited only by users with Craft permissions
- Note that all fields are mandatory in order to create (Publish) a new Feed Page
Authors:
- Name
- Default image (silhouette) + ״Credit״ and ״Alt text" will use the author name by default
- Joined date (according to the user creation date by default)
- URL (according to the username and can't be changed)
- The default text next to the author joining date within its page will be "Joined:"
- The default button-text at the bottom of the page will be "Show More"
- Name
- Image
- Alt text - The author name can be used here
- Credit - If no credit is required, you can use the author name for this field as well
- Byline (will only appear within TPT's post page template for now)
- Bio
- Join date (use the date picker to select the author's joining date)
- Social links (add social networks account that will appear on the page)
- Joined date text ("Joined:")
- Article loader button ("Show More")
August 2020
Manual recommendations
Only brands that use a post-page template on their websites that support the Manual Recommendations component (see image below) will be able to use it.
For the 1st phase, due to the upcoming migration, only TPT editorial will be able to use this feature which will enable them to manually select exactly 4 recommended articles that will appear at the bottom of the article pages. This can increase the readers’ session durations and attract them to view additional content.
For example, you can write an article about Messi and manually add 4 other articles (about Barca, about the champions league, about Copa del Ray and about La Liga) that will be added to the bottom of the page as “Featured Stories” for your readers.
We’re currently reviewing the possibilities to expand this feature to apply for the rest of our templates that are used by all brands’ CMS users.
July 2020
Social sharing:
Destination suggestions:
In order to help you featuring your articles into feeds faster without relying on your memory, we have added to the Publisher a destination suggestion functionality to help you with that.
You can add each destination by simply clicking on the “plus” icon.
Within the Publisher you can switch on the “Sponsored Article” toggle to add custom branding to an article.
Leaving one of the fields empty will result in not showing the item on the post page.
Logo Image
1. Upload the logo that will be used for the sponsored article. The logo file format must be SVG.
Note for the logo designers or providers: The logo SVG file must be monochromatic and without height & width params in order for it to look good on the site
2. Logo URL- Add the URL to redirect the readers when clicking on the logo.
3. Sponsored text -Add the text which will be placed before the brand name. For example: “Presented By”. The field is limited to a maximum of 40 characters.
4. Brand name
Add here the brand name that provides the sponsorship. The field is limited to a maximum of 40 characters.
June 2020
Pre-defined list items:
During the COVID-19 times, evergreen articles and listicles became much more abundant as part of the content strategy shift.
Open in a new tab:
3. A website that isn't related whatsoever to your article's content.
- Select a word within the Editor that should be hyperlinked
- Click on the "Link" logo
- Insert the URL and check any of the boxes if necessary
Hyperlink suggestions:
- Finish writing your article
- Head to the SEO & Tags section and click on "Add Hyperlinks" at the bottom
- The "Add Hyperlinks" section will appear next to the Editor
- Select one relevant page or article and click on the "Copy URL" button (next to the page/article name)
- Select a word within the article, click on the "add link" button" and paste the Page's URL that will be added as a Hyperlink
- You can click on the "refresh" icon within the menu at any time to update the results
April 2020
Article Subtitles
We added the capability to present the articles' subtitles within our website's cards section.
The text itself for the subtitle will be taken from the "Meta Description" field in the CMS (if left empty, the first 160 characters will be used for that).
Currently implemented within Floor8 & DBLTAP (TBL is up next).
Hyperlink Suggestions
As we are continuing with our professional approach, we're glad to present to you the 1st phase of the "Hyperlink Suggestions" feature.
- Finish writing your article
- Head to the SEO & Tags section and click on "Add Hyperlinks"
- The Hyperlinks menu will appear next to the Editor
- Select one relevant page and click on the "Copy URL" button (next to the page name)
- Select a word within the article, click on the "add link" button" and paste the Page's URL that will be added as a Hyperlink
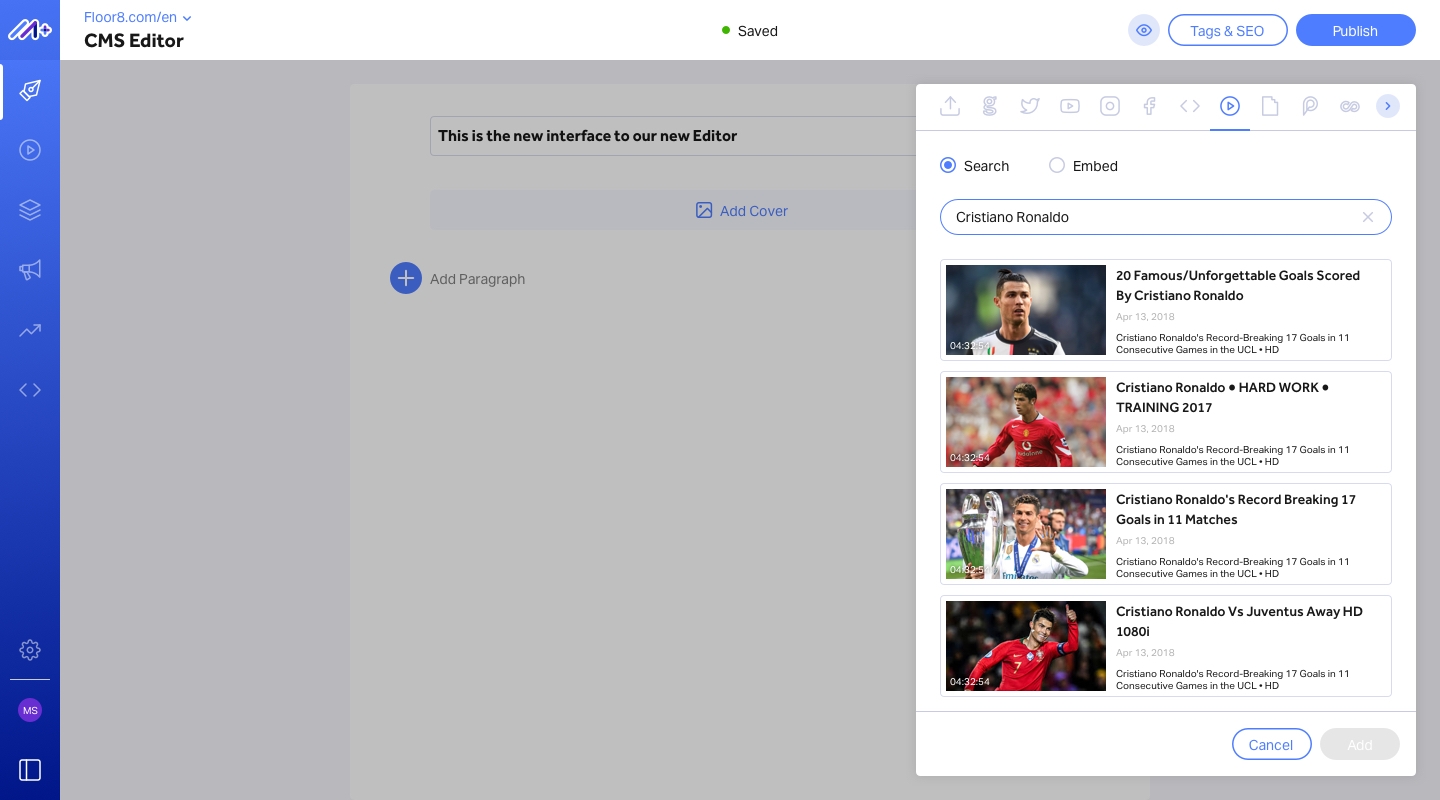
VMS video search (Voltax player)
Finally, no more moving around between screens when adding an internal MM video to your articles.
Now, you can simply search for Voltax player's videos from within the CMS and embed it directly to your articles.
CMS Images
A new 1:1 cropping ratio was added to help diversify the image representation in your articles
- Image upload size limit was increased from 3MB to 5MB
- Reflection of the image upload limitations was added to the media element panel, so users can see them in advance (before uploading an image)